Useful Links
Australian Carriage Driving Society
www.acds.org.au
Clydesdale Horse Society of New Zealand
www.clydesdale.org.nz
Commonwealth Clydesdale Horse Society
www.clydesdalehorse.com.au
Percheron Horse Breeders Association of Australia Inc
www.percheron.com.au
Shire Horse Breeders Australia Inc
www.shirehorse.com.au
Shire Horse Society Australia Inc
www.shirehorsesociety.com.au
Australian Heavy Horses
www.aussieheavyhorses.com
Donkey All Breeds Society of Australia Inc.
www.donkeyallbreedsaustralia.org
Clydesdale Horse Society
www.clydesdalehorsesociety.com
Shire Horse Society
www.shire-horse.org.uk
Suffolk Horse Society
www.suffolkhorsesociety.org.uk
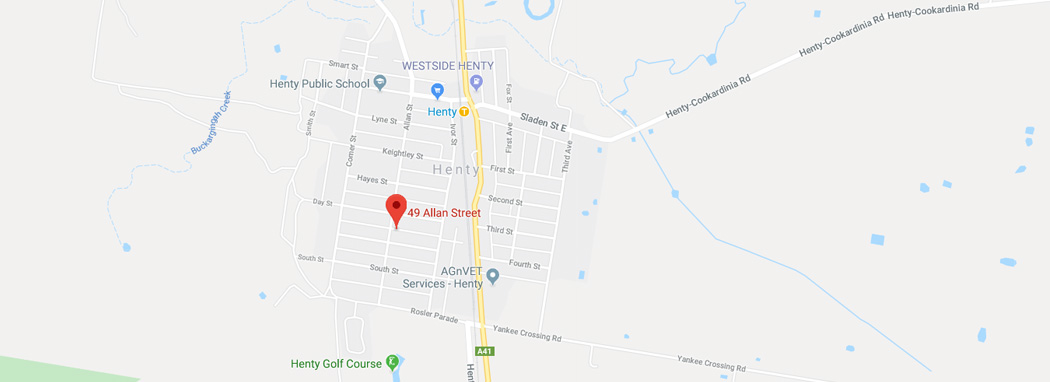
Contact Asterisk Horse-Collars & Harness
For enquiries please contact:
MARK PORTER
49 Allan Street,
Henty NSW Australia 2658
Telephone / Facsimile: (02) 6929 3441
International Telephone / Facsimile: +61 2 6929 3441
Email: This email address is being protected from spambots. You need JavaScript enabled to view it.
PARTS OF A COLLAR / MEASURING A COLLAR

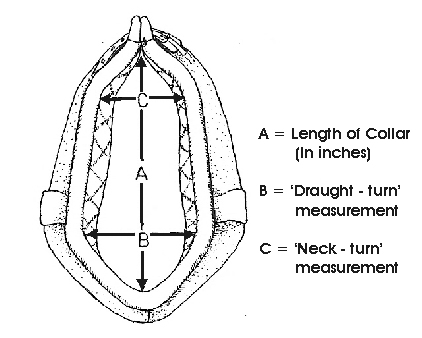
The best way to determine the correct size collar for a horse is to ask your collar-maker to measure it accurately with their collar gauge (the length, distance between the draught-turns & distance between the neck-turns, all in inches).
If that is not possible, there are a couple of other ways:
1. Borrow a range of old collars to find one that is close to fitting. Measure the inside of the rim of this collar with an inch rule, supplying the collar-maker with the three measurements shown in the image above.
An example of a well-fitting collar is displayed here:
 OR
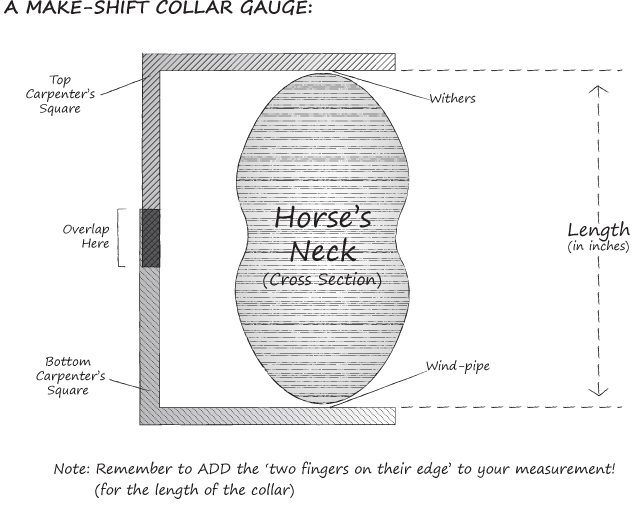
OR2. Use a couple of large carpenters’ squares to make your own makeshift collar gauge. To get the approx. length, place the two squares together [like the letter ‘C’] several inches in front of the horse’s withers, with the bottom of the C several inches away from the horse’s chest/shoulders, & the top of the C resting several inches in front of the withers [you are guessing where the body of the collar will eventually lie against the horse’s “collar bed” (from in front of the withers to above & in front of the points of the shoulder)];
Slide the two long sides of the squares together up & down until you have the correct length. Note that you must also allow an extra two fingers distance – on their edge – between the horse’s windpipe & the inside of the throat of the collar; ie. one needs to add this distance to one’s measurement with the squares. Someone would need to help you with this [for example, they would need to measure – with a separate rule – the distance between the inside top & bottom of your C]. You need to repeat this procedure to determine the draught-turn & neck-turn measurements, adding the distance of the flat of your hand to these two measurements.
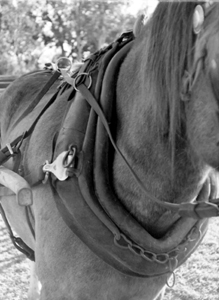
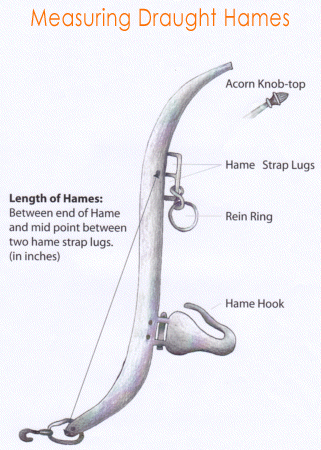
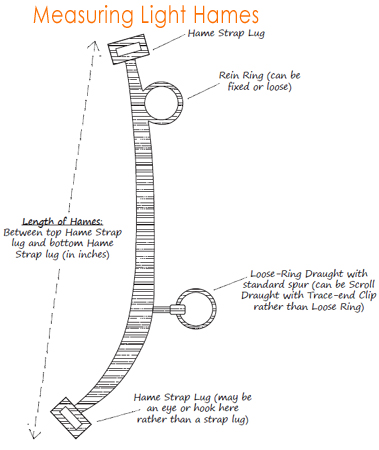
Measuring Hames
CARING FOR YOUR COLLAR
Thank you for purchasing a quality, Australian-made, long-straw horse collar, hand-made from natural materials to ensure the comfort of your horse.
The following information will assist you in gaining the best use of your collar:
- On receipt of the collar, don't be afraid to cut the string tying the two 'ears' together at the top of the rim and, similarly, carefully snip the twine holding the two halves of the body together at the top. The collar is tied together during manufacture to preserve the shape;
- Soon after delivery, please ensure that you give the collar a generous application of leather dressing such as 'Ge-Wy' or 'Dubbin'. This is necessary because our manufacturing process requires the leather to be soaked in water, thus leaching out much of the preservative, which must be replaced. Put the collar out in the sun for a few hours to enable the dressing to soak in, and apply again if necessary. Finally, polish off surplus dressing with a soft cloth;
(Note: If you intend to use the collar for show purposes, ensure that it is dyed prior to applying the leather dressing. In the case of a show collar, only apply a light leather dressing to the flesh side (underside) of the side pieces and strapping, and use a good quality boot polish such as 'Parade Gloss' for the hair side (top) to maintain a good shine for the show ring.)
- With a collar-check-lined collar, pin a few little bags of naphthalene flakes or moth balls to the body when the collar isn't going to be used for a while, to protect this lining from moth damage. Dirt and sweat can be removed periodically using a stiff clothes brush or horse brush;
- With a leather-lined collar, give the lining a light leather dressing upon purchase; then after each use, give the lining (especially from the draught turns to the throat of the collar) a wipe over with a damp sponge or cloth to get rid of the sweat. This will help prevent cracking of the lining;
- With all collars, always open them to a minimum to get them on and off the horse, sliding the collar to the narrowest part of the horse's neck each time. After removing the collar, do the strap(s) up and hang upside down, with the lining side facing you, on a peg to air.
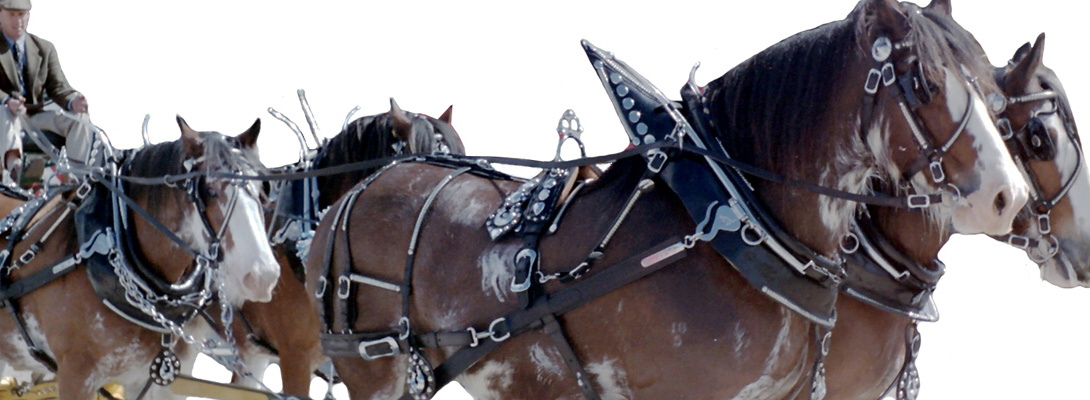
CARE OF SHOW HARNESS
- Top surfaces of harness leather should be regularly polished with “Parade Gloss” Black Polish to maintain shine;
- Bottom surfaces of all harness should be regularly given a good leather dressing with a product such as “Ge-Wy” or “Dubbin” to preserve the leather;
- Top surfaces of patent leather should be dusted off, given a light spray of “Mr Sheen” & then polished off.